How to Frost a Cake with Frosting: The Ultimate Baker's Guide
2026-09-16
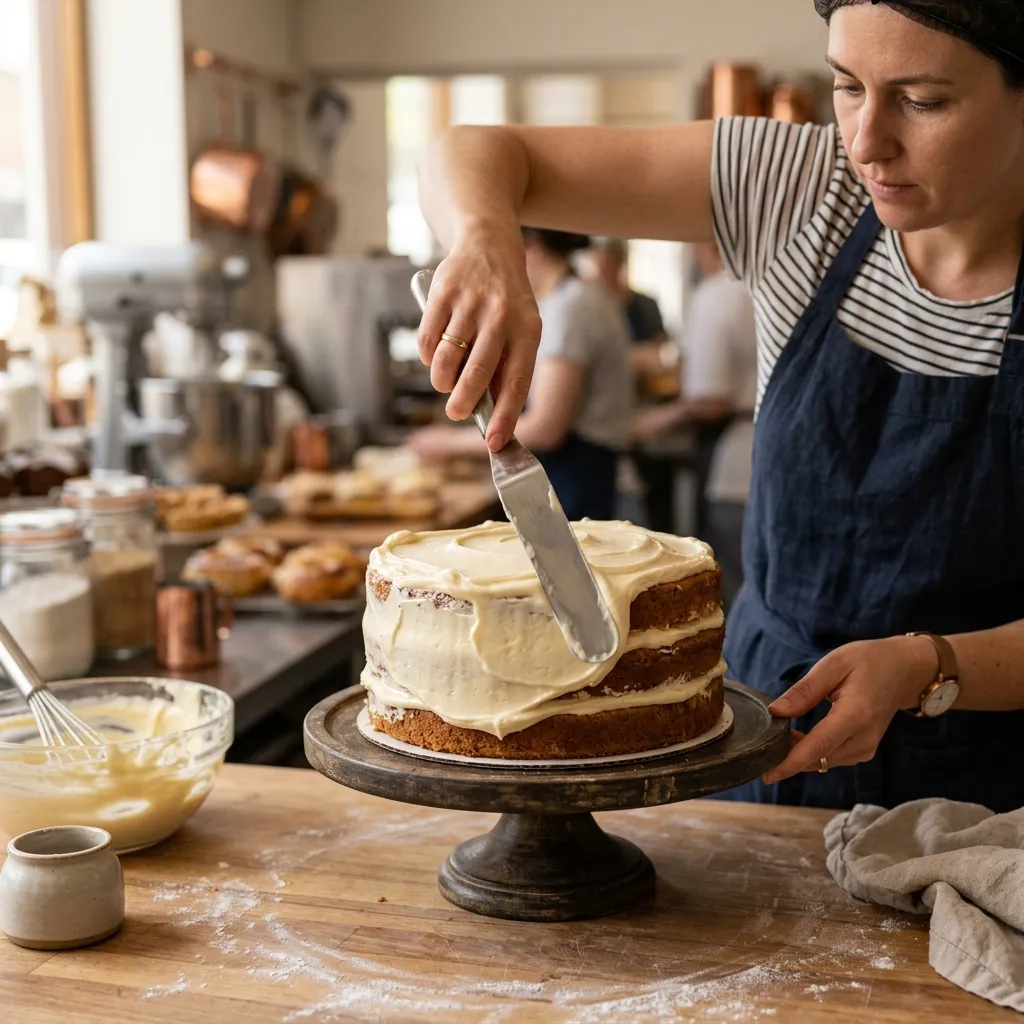
My first Saturday morning on bakery production was an absolute nightmare.
I had thirty vanilla layer cakes to frost before 9 AM. I tried slapping warm buttercream on room-temperature cake rounds. Sponge crumbs tore off into the white icing. The sides sagged like a barrel.
Our senior decorator took one look at my mess and laughed.
She shoved my warm cakes straight into the freezer for fifteen minutes.
That cold shock firms the crumb instantly. When the sponge is cold, you can scrape an offset spatula against it without tearing a single flake.
We spin the turntable and slap on a sheer crumb coat. Twenty minutes in our walk-in fridge turns that base coat rock hard.
After that, your final buttercream coat glides on smooth as silk. Crisp edges every single time.
Quick Baker's Notes for Best Results
- Optimal Core Sponge Temperature: 36°F to 40°F (cold crumb resists tearing under spatula pressure).
- Ideal Buttercream Working Temperature: 65°F to 68°F (emulsion stays silky without weeping or sliding).
- Bench Scraper Angle: Exactly 45 degrees against the spinning perimeter of the cake.
- Crumb Coat Chill Window: 25 to 30 minutes at 38°F to lock crust integrity before the topcoat.
The Equipment You Actually Need (and What You Can Skip)
Walk into any culinary supply store and you will see dozens of specialized plastic gadgets claiming to give you perfect cake edges. You do not need ninety percent of them. What you do need are four commercial-grade tools that perform under pressure.
The Heavyweight Cast-Iron Turntable
If you are trying to frost a cake on a stationary dinner plate or a lightweight plastic turntable that wobbles when you press against it, stop immediately. A heavy cast-iron or aluminum turntable with ball bearings spins smoothly in a single continuous arc. That momentum is what allows your bench scraper to produce a uniform, groove-free cylinder.
The 8-Inch Offset Spatula
A straight butter knife forces your knuckles directly into the frosting surface. An offset spatula drops the blade two inches below the handle axis, keeping your fingers elevated. The flexible stainless steel blade acts like a suspension spring, distributing down-force evenly across delicate cake crumbs.
Stainless Steel Bench Scraper
Plastic scrapers flex too much when they meet cold buttercream, creating ripples along the cake wall. A rigid, six-inch stainless steel bench scraper with a squared 90-degree corner ensures your sides stay perpendicular to the cake board.
Heavy-Duty Pastry Bags
Using a tablespoon to deposit filling between layers almost always leads to uneven tiers. Fitting an eighteen-inch disposable piping bag with a wide round tip allows you to deposit a mathematically consistent coil of buttercream between each sponge layer.
Step 1: Sponge Architecture, Chilling, and Leveling
The single most destructive mistake home bakers make is attempting to frost room-temperature or freshly baked cakes. Fresh sponges are fragile, moist, and release loose crumbs at the slightest friction.
Before picking up a spatula, bake your sponges using exact weight ratios—we always calculate ingredient weights using our density-accurate cups to grams converter because volumetric measuring errors throw off cake density. Once your layers cool to room temperature, wrap them tightly in double layers of food-grade plastic wrap and chill them in the refrigerator for at least two hours (or freeze for 45 minutes).
A cold sponge contracts its crumb matrix. When you run a serrated knife across the crown, the blade slices cleanly rather than snagging. Place your chilled layer on your turntable, rest your serrated knife horizontally at the lowest point of the baked dome, and spin the turntable slowly into the blade while keeping your knife hand stationary. Slice off the crown in one fluid motion. Save those golden cake trimmings—we use our scraps to test new recipes or roll them into batches using our guide on repurposing leftover cake scraps into cake pops.
Step 2: Buttercream Consistency and Emulsion Mechanics
Your frosting texture dictates eighty percent of your decorating success. Buttercream that is too cold will rip chunks out of your cake; buttercream that is too warm will sag, bubble, and cause your tiers to slide off center.
According to the King Arthur Baking Test Kitchen butter temperature analysis, butter loses its structural plasticity once it warms past 70°F. For optimal piping and smoothing, you want your buttercream registering between 65°F and 68°F on an instant-read probe thermometer.
If you are using classic American buttercream (butter beaten with powdered sugar), beat it with the paddle attachment on the lowest speed for five full minutes before applying it. This presses out the microscopic air pockets that create ugly pinholes on your finished surface. If you prefer European styles, the Serious Eats Swiss Meringue Buttercream stability guide confirms that the egg-white matrix provides far superior glide and resistance to tearing on tender sponge crumbs.
Step 3: Stacking and the Structural Dam
Now comes the assembly. Place an 8-inch greaseproof cardboard cake round directly on the center of your turntable. Smear a tablespoon of frosting onto the cardboard—this acts as an adhesive anchor so the cake cannot migrate during spinning.
- Center Layer One: Place your first leveled layer directly over the glue patch, cut side facing up.
- Pipe the Perimeter Dam: Pipe a firm border of stiff buttercream roughly one-half inch high around the outer circumference of the layer. This dam acts as a barrier that prevents soft fruit curds, salted caramel, or whipped ganache from oozing outward into your exterior frosting coat.
- Fill the Center: Spoon your filling inside the dam. Level it with your offset spatula until it is flush with the top edge of your piped border.
- The Upside-Down Cap: Take your second layer and place it on top, but flip it cut-side down. The smooth, flat bottom of the cake now serves as your top surface, giving you an instantly level platform with zero loose crumbs.
Step 4: The Crumb Coat (The Non-Negotiable Barrier)
Never attempt to frost a cake in a single layer. The crumb coat is an ultra-thin, sacrificial primer coat designed to lock every stray fleck of sponge into place before you apply the pristine presentation layer.
Scoop one cup of frosting into a secondary bowl—never dip a crumb-laden spatula back into your main frosting reservoir. Using your offset spatula, spread an eighth-inch coat across the top and sides of the cake. It should look translucent and messy; you should be able to see the sponge right through it.
Hold your bench scraper at a 45-degree angle against the spinning cake to remove excess frosting. Transfer the cake to the refrigerator for 25 to 30 minutes. When you touch the surface with your knuckle, the butterfat must feel completely firm and dry.
Step 5: Applying the Topcoat and Sharp Edge Technique
Once the crumb coat is chilled solid, your cake is structurally fortified. Now you can apply the presentation coat without a single crumb breaking through.
Loading the Crown
Deposit three generous cups of buttercream directly on the top center of the cake. Hold your offset spatula flat against the top at a slight ten-degree tilt. Rotate the turntable while holding your hand steady, working the mound outward until it overhangs the top edge like a small cliff.
Coating the Cylinder Walls
Load buttercream onto the tip of your spatula and paddle it generously around the vertical sides of the cake. Do not worry about perfection yet; the objective is total coverage with a thickness of roughly one-quarter inch.
The 45-Degree Sweep
Rest the base of your stainless steel bench scraper flat on the turntable board. Angle the blade back at 45 degrees toward the rotation direction. Lock your elbow against your hip to eliminate hand tremor. Now, spin the turntable through a continuous 360-degree rotation. The blade will plane the high spots and fill the valleys. Wipe the scraper clean after every single rotation.
Shaving the Top Lip
After smoothing the sides, you will notice a raised crown of frosting standing proud above the top perimeter. Hold your offset spatula completely horizontal. Starting from the outside edge, gently swipe inward toward the center in a straight line. Wipe the blade on a damp cloth, rotate ninety degrees, and repeat until the rim is razor sharp.
Commercial Costing and Pricing Your Finished Cakes
If you run a home bakery or cottage food enterprise, time spent frosting directly impacts your operating margins. A cake that takes forty-five minutes to frost consumes valuable labor that must be accounted for in your pricing model. We recommend logging your ingredient weights using the USDA FoodData Central standard butterfat nutrient data to calculate exact recipe costs, and running your batch expenses through our bakery profit margin calculator to make sure your custom designs generate true profit rather than unpaid hobby labor.
Storage and Transportation Tips
Once fully frosted, chill your cake in the refrigerator for at least 2 hours so the buttercream sets firm before transporting. A chilled cake is much sturdier and far less likely to shift or slide during travel. Bring the cake back to room temperature about 1 hour before slicing so the buttercream softens to a creamy, melt-in-your-mouth texture.
If you run a custom cake business, you can accurately price your specialty celebration cakes with our free Bakery Profit Margin Calculator.
Frosting a smooth, sharp-edged cake just takes a little patience, cold cake layers, and the right scraper angle. Don't worry if your first cake isn't flawless—every cake you frost builds muscle memory. Have fun with it, and enjoy the delicious results!
Baking or Selling This Recipe? Use Our Free Tools
Baking in Your Kitchen? Convert & Scale in Grams
Measuring cups can vary by up to 25% in flour weight. Convert cups to exact metric grams or scale this entire recipe (2x, 3x) in seconds.
Selling Custom Cakes? Price for Real Bakery Profit
Calculate ingredient food costs, packaging, and labor to set high-margin pricing for your home bakery or custom pastry orders.

Sara Ait Dahan
Professional Baker & Founder of Sweety's Bakery
Passionate about baking precision and culinary science, Sara founded Sweety's Bakery to empower home bakers and pastry chefs worldwide. Built from real bakery workbench experience, she creates tested gluten-free recipes, calibrated density calculators, and bakery business tools.