How to Make Cake Pops: The Ultimate Step-by-Step Guide for Perfect Treats
2026-09-16
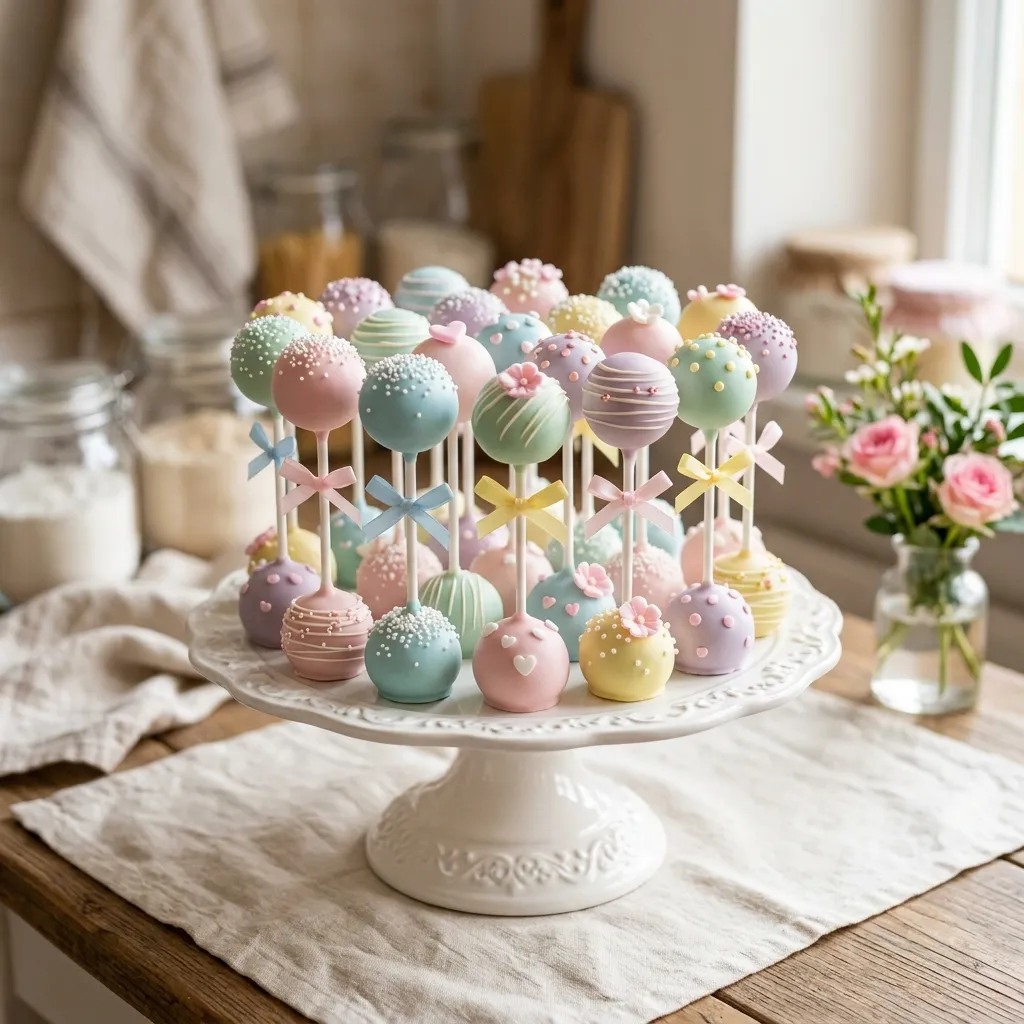
I once cried over eighty broken cake pops at 2 AM.
It was our second big wedding order at Sweety's Bakery. I had sixty vanilla pops standing upright in styrofoam blocks. They looked gorgeous under our kitchen fluorescent lights.
Then I heard a tiny snap.
I looked closer. A hairline fracture cracked across the first pink sphere. Five seconds later, another one cracked. Within twenty minutes, forty cake pops had split right down the equator like broken eggshells.
Do you know what caused that heartbreak? Our freezer.
I had frozen the cake balls solid so they wouldn't fall apart on the lollipop sticks. But when rock-hard frozen cake meets warm melted candy melts, physics wins. The cake warms up, pushes outward against the hard candy shell, and shatters it into pieces.
Now, I never freeze cake pops. Ever.
I chill them in our reach-in cooler just until firm. Then I dab melted candy on the stick tip, push it in halfway, and let that chocolate seal turn rock solid before any dipping happens.
Quick Baker's Notes for Best Results
- Ideal Crumb-to-Binder Weight Ratio: 7:1 (650g baked sponge crumb to exactly 85g frosting).
- Portion Weight per Cake Pop: 26g to 28g (measured using a #40 mechanical cookie disher).
- Dipping Chocolate Bath Temperature: 88°F to 92°F for compound coating or tempered chocolate.
- Pre-Dip Chilling Time: 15 minutes in the freezer or 2 hours in the refrigerator (never dip ice-cold frozen balls).
The Truth About the Ingredients
You do not need gourmet specialty flour to bake a cake pop base, but you do need to understand how the components interact under pressure.
The Cake Base: Scratch vs. Box Mix
Purists often scoff at boxed mixes, but in commercial pastry kitchens, boxed yellow, vanilla, or devil's food mixes are frequently chosen for cake pops because their uniform moisture retention and high oil content produce an exceptionally fine, pliable crumb. If you bake from scratch, use our grams to cups baking conversion calculator to avoid packing too much flour into your measuring cups, which causes dry, crumbly cake that requires excess frosting to bind.
The Binder: Why Buttercream Trumps Cream Cheese
While canned cream cheese frosting is popular, its water content makes it temperamental. Excess moisture can cause melted chocolate to seize when dipping. We use a standard American buttercream (unsalted butter and powdered sugar) or melted white chocolate ganache. Butter fat firms up rigidly in the refrigerator, giving the ball the structural backbone it needs to stay upright on a lollipop stick.
Compound Coatings vs. Couverture Chocolate
Real couverture chocolate made with cocoa butter tastes divine, but as demonstrated in the Serious Eats chocolate tempering and dipping science, cocoa butter requires strict temperature tempering (heating to 115°F, cooling to 81°F, and reheating to 89°F) or it will streak and fail to snap. For beginners and high-volume orders, premium compound candy melts (which use palm kernel oil in place of cocoa butter) melt easily, set within minutes, and withstand ambient room temperatures without blooming.
Step 1: Baking, Cooling, and the Grinding Method
Bake a standard 9x13-inch sponge cake according to your recipe until an internal probe reads 205°F. Cool it completely on a wire rack for two hours. Attempting to crumble warm cake melts the butterfat into glue.
Once cold, trim away any hard, browned edges or crunchy corners. Those tough crusts will not absorb moisture and will leave hard, gritty lumps inside your finished pops. Slice the remaining tender sponge into cubes and place them into the bowl of a stand mixer fitted with the paddle attachment (or rub them vigorously between your palms).
Turn the mixer on low speed for two minutes. The paddle breaks the sponge into microscopic, fluffy crumbs that resemble coarse sand.
Step 2: The Binding Process (The 7:1 Rule)
Here is where amateur bakers go wrong: they spoon frosting into the bowl until the mixture looks like wet cookie dough. That excess fat makes the ball too heavy, causing it to drop straight off the stick when submerged in chocolate.
For a standard 9x13-inch cake yielding roughly 650 grams of trimmed crumbs, start with exactly 85 grams (approximately 3 to 4 level tablespoons) of buttercream. Add it one tablespoon at a time while running the mixer on low. Stop as soon as a handful of crumbs holds together like damp packing snow when squeezed in your palm. If you press it into a ball and your hands glisten with grease, you have added too much binder.
Step 3: Precise Portioning and Compacting
Consistency is the mark of a professional baker. Use a #40 mechanical cookie scoop to portion the dough into 26- to 28-gram mounds.
Place each portion between your palms and compress it firmly before rolling. Compacting forces out microscopic pockets of trapped air. If air remains inside the ball, it will expand when warm, blowing unsightly cracks through your finished chocolate coating. Roll each portion between your palms using circular pressure until you have a smooth, sphere without surface creases.
Place the rolled balls onto a parchment-lined baking sheet and refrigerate them for 2 hours (or freeze for exactly 15 minutes).
Step 4: The Anchor Dip (The Secret to Sticks That Stay)
Never push a dry lollipop stick into a cold cake ball. Without a chocolate adhesive anchor, the ball will slide right off the moment you tip it upside down.
- Melt the Coating: Melt 340 grams of candy melts in a microwave-safe mug in 30-second bursts at 50% power, stirring between each burst.
- Thin the Coating: Add one tablespoon of refined, neutral coconut oil or paramount crystals. Stir until the chocolate falls off your spoon in a continuous, ribbon-like cascade.
- The Anchor: Take a 6-inch paper lollipop stick, dip the tip one-half inch deep into the melted coating, and immediately insert it about halfway into a chilled cake ball.
- Reset: Place the pops back onto the baking sheet, stick upright, and return them to the refrigerator for 10 minutes. That small pool of chocolate inside the ball hardens into a rigid internal rivet that locks the stick permanently in place.
Step 5: Dipping Dynamics and the Thermal Shock Rule
Why do cake pop coatings crack twenty minutes after dipping? Thermal shock.
If you dip a rock-hard, sub-zero frozen cake ball into warm 95°F chocolate, the cold core forces the hot chocolate to contract and solidify instantly. Then, as the cake ball warms back up to room temperature, the sponge expands outward, fracturing the brittle chocolate shell into spiderweb cracks.
Ensure your cake pops are chilled (around 45°F to 50°F), but never frozen solid.
- Submerge in One Motion: Pour your thinned coating into a deep, narrow vessel (a tall coffee mug or mason jar). Plunge the cake pop straight down in one smooth stroke until the chocolate just kisses the stick above the anchor point.
- Never Swirl or Stir: Swirling the pop inside the coating exerts drag torque on the stick, loosening your internal anchor.
- Lift and Tap: Pull the pop straight out vertically. Hold the stick upright with one hand, and use your other hand to gently tap your wrist. This creates gentle vibrations that cause excess chocolate to sheet off the sphere in a smooth curtain.
- Invert and Dry: Stand the finished pop upright in a high-density polystyrene foam block or specialized cake pop drying stand. Add sprinkles within the first 60 seconds before the coating sets.
Costing and Commercial Margins for Home Bakers
If you are producing cake pops for farmers markets, birthday dessert tables, or custom wedding favors, you must account for ingredient density and packaging overhead. Refer to the USDA FoodData Central nutrient profiles for baked sponge to benchmark batter costs, and follow the FDA confectionery food safety guidelines for ambient shelf-life storage. Run your batch expenses through our bakery profit margin calculator to ensure your per-pop retail pricing delivers a minimum 65% gross margin after accounting for sticks, cellophane sleeves, and ribbons. (If you want to master exterior cake smoothing alongside cake pop rolling, explore our complete cake frosting masterclass.)
Storage and Party Prep Tips
Store cake pops in an airtight container in the refrigerator for up to 7 days, or freeze them for up to 2 months. To prevent condensation from spotting the chocolate when thawing, transfer the pops from the freezer to the fridge for a few hours before bringing them to room temperature.
If you sell dessert platters or take custom party orders, calculate your batch pricing and profit margins with our free Bakery Profit Margin Calculator.
Making bakery-worthy cake pops is all about keeping your proportions balanced and your coatings smooth. Once you get the hang of dipping and tapping, you can decorate them for any party or celebration. They're as fun to make as they are to eat!
Baking or Selling This Recipe? Use Our Free Tools
Baking in Your Kitchen? Convert & Scale in Grams
Measuring cups can vary by up to 25% in flour weight. Convert cups to exact metric grams or scale this entire recipe (2x, 3x) in seconds.
Selling Custom Cakes? Price for Real Bakery Profit
Calculate ingredient food costs, packaging, and labor to set high-margin pricing for your home bakery or custom pastry orders.

Sara Ait Dahan
Professional Baker & Founder of Sweety's Bakery
Passionate about baking precision and culinary science, Sara founded Sweety's Bakery to empower home bakers and pastry chefs worldwide. Built from real bakery workbench experience, she creates tested gluten-free recipes, calibrated density calculators, and bakery business tools.